How to Use CapCut to Design Eye-Catching Product Demos
Creating compelling product demos is a powerful way to engage potential customers and showcase your product's value. In today’s visually-driven world, having an eye-catching and professional-looking product demo can set your brand apart. CapCut desktop video editor is an intuitive and feature-rich tool designed for creators of all skill levels to produce stunning videos. This blog will guide you through using CapCut to create product demos that captivate your audience and drive conversions.
Why Choose CapCut for Product Demos?
CapCut desktop video editor is free video editing software. Whether you're new to video editing or an experienced creator, CapCut offers the following benefits:
- User-Friendly Interface: The layout is intuitive, making it accessible even for beginners.
- Wide Range of Features: From basic trimming to advanced effects, it includes tools like keyframing, overlays, and motion graphics.
- Cross-Platform Capabilities: It works seamlessly with mobile and desktop, ensuring flexibility.
- Free and Professional Versions: While the free version is feature-packed, the Pro version provides advanced tools for those needing more customization.
Step-by-Step Guide to Creating Eye-Catching Product Demos
Here’s how you can use CapCut desktop video editor to create product demos that resonate with your audience:
Plan Your Product Demo
Before diving into editing, outline the goal of your demo. Ask yourself:
- What problem does your product solve?
- Who is your target audience?
- What features should you highlight?
Make a storyboard to streamline the sequence of your demo. This will save you time during editing and ensure a cohesive narrative.
Import Your Media
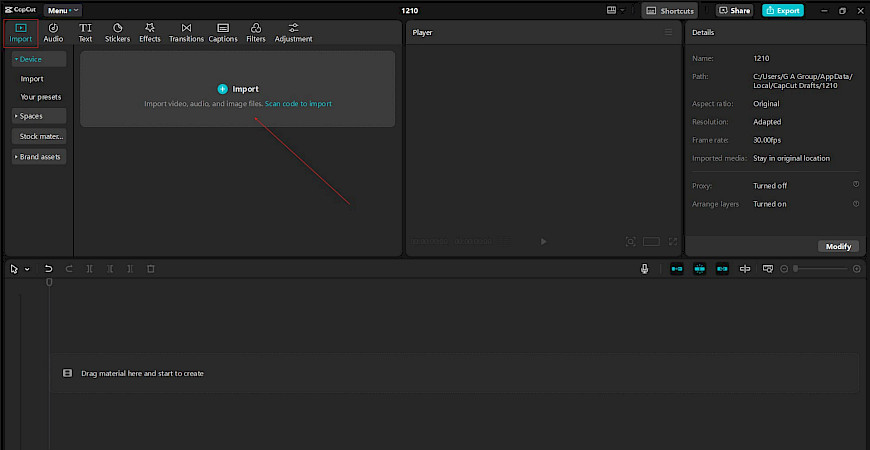
After launching the CapCut desktop video editor, start a new project and import your media files. This includes product footage, screen recordings, and additional assets like logos or text overlays.
- Drag and drop the files into the timeline in the order you wish to present them.
Edit the Timeline
Trimming and Splitting: Use the trim and split tools to remove unnecessary parts and highlight the product’s key features. You can remove background from video by using video background remover. A concise video holds the viewer’s attention better.
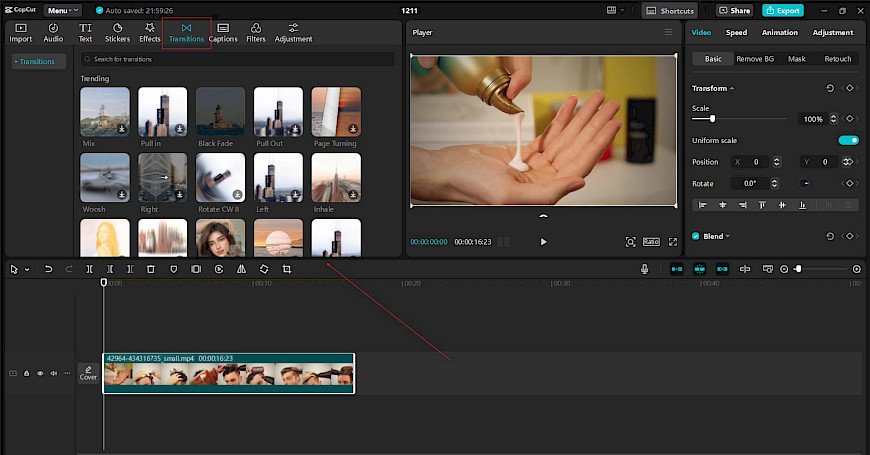
Transitions: Add smooth transitions between clips to create a professional look. CapCut offers options like fades, text-to-speech, slides, and zooms, which you can access under the “Transitions” tab.
Enhance with Effects and Filters
CapCut’s effects and filters can make your product demo visually appealing.
- Filters: Use color grading filters to set the tone of your video (e.g., warm tones for a lifestyle product or cool tones for tech gadgets).
- Special Effects: Add highlights or glow effects to emphasize the product’s features.
For example, if you’re showcasing a smartwatch, you can use motion blur effects to focus on its sleek design and functionality.
Add Text and Graphics
Product demos often need on-screen text and graphics to explain features or display key information.
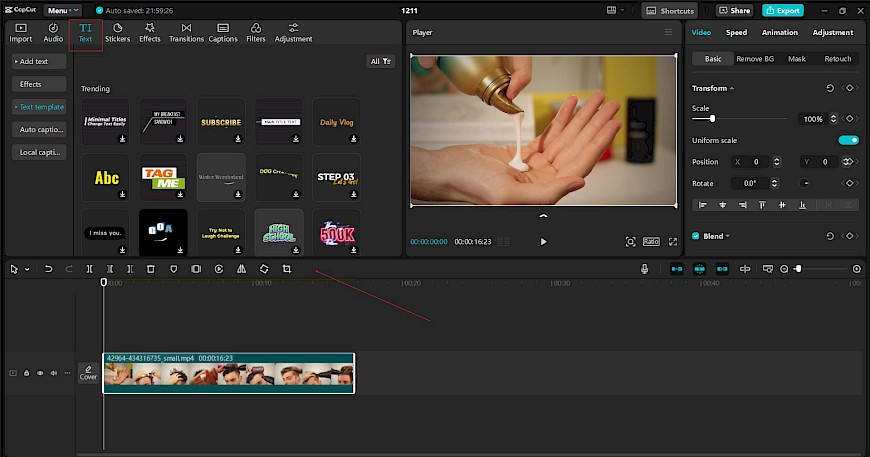
- Go to the “Text” menu to add headings, subheadings, or animated titles.
- Use motion graphics to display product specifications or benefits dynamically.
Tip: Stick to a professional and readable font style that aligns with your brand’s identity.
Incorporate Music and Sound Effects
Everyone enjoys music and sound effects. It can significantly enhance your video viewer’s experience.
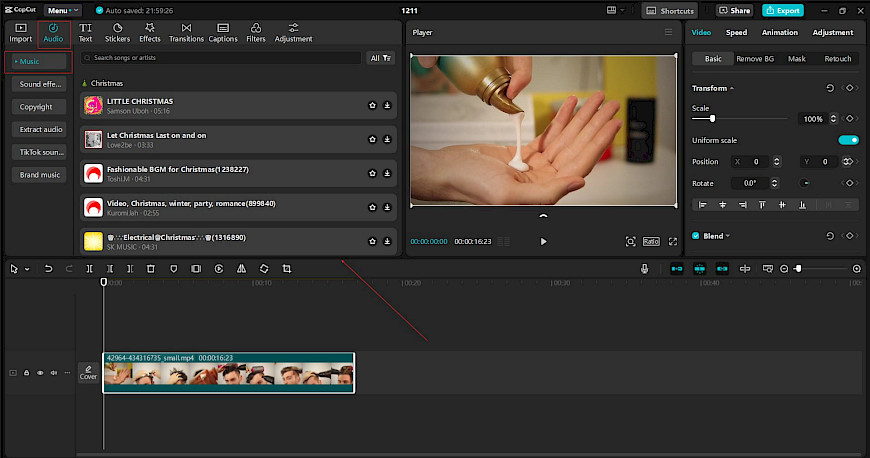
- Browse CapCut’s library for royalty-free music or upload your own.
- Sync sound effects with specific actions, such as button clicks or product interactions, to make the demo more immersive.
Leverage Keyframing for Advanced Animations
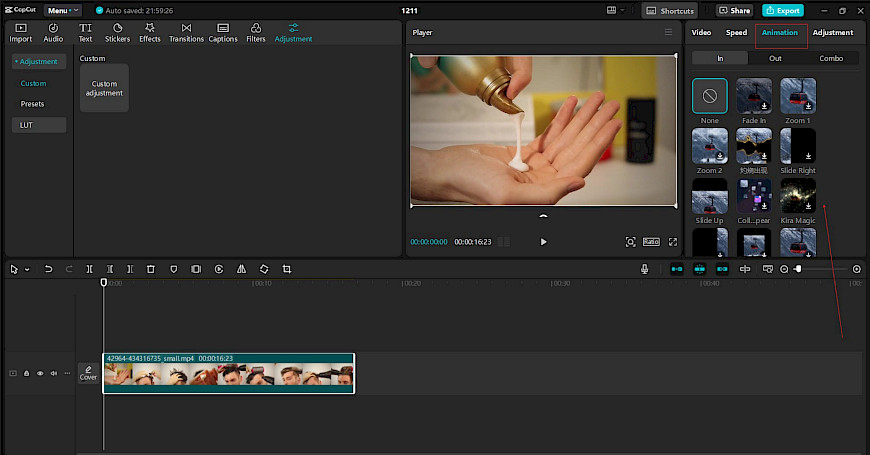
CapCut desktop video editor includes a keyframing feature that allows you to animate objects within the frame. This is perfect for:
- Rotating 3D models of your product.
- Animating arrows or highlights to direct attention to specific features.
Use Overlays for Layered Visuals
Overlays are easy to use, you can combine multiple visual elements. For instance:
- Show a screen recording of your software alongside a live product demo.
- Include customer testimonials in picture-in-picture mode.
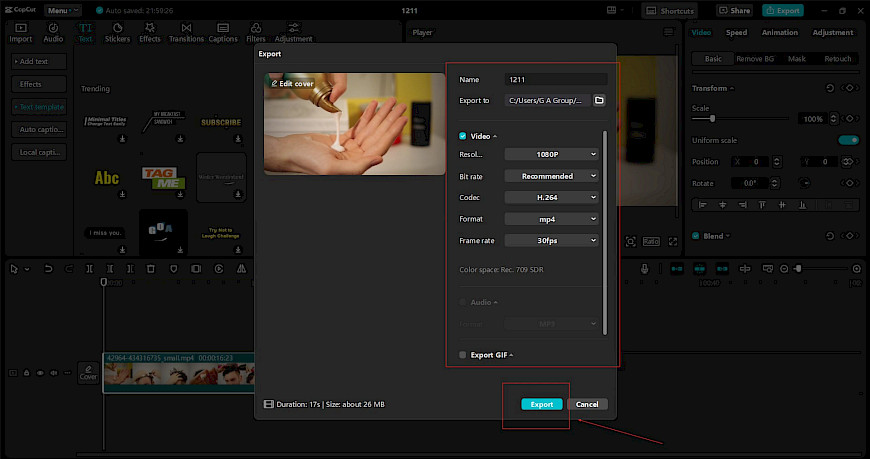
Export in High Quality
Once your demo is complete, preview the video to ensure all elements align perfectly.
- Click “Export” to save your video.
- Choose the appropriate resolution and format based on your target platform (e.g., 1080p for YouTube or 720p for social media).
Tips for Designing High-Converting Product Demos
- Keep It Short: Aim for 60–90 seconds to maintain viewer attention.
- Focus on Benefits: Highlight how the product solves a problem rather than listing technical specs.
- Use Call-to-Actions (CTAs): End the demo with clear instructions, such as “Visit our website” or “Buy now.”
- Optimize for Platforms: Tailor the video’s aspect ratio for platforms like Instagram (1:1), YouTube (16:9), or TikTok (9:16).
CapCut Pro Features for Advanced Creators
If you’re using CapCut Pro, you can access advanced features like:
- AI Background Removal: Highlight your product by isolating it from its background.
- HDR Effects: Enhance video quality to make the product look more appealing.
- Customizable Templates: Use pre-designed templates for quicker edits.
Conclusion
Creating eye-catching product demos with the CapCut desktop video editor is a straightforward process that combines creativity and technical precision. By following this guide, you can produce professional-quality videos that not only showcase your product but also captivate your audience.
Remember, a compelling product demo isn’t just about good visuals — it’s about telling a story that resonates with your customers. Start designing your product demo today with CapCut, and watch your brand stand out in the competitive market!


