7 Tips to Free up Hard Drive Space on macOS
Disk space is a limited resource on our computers, and it should be used wisely. With so many popular apps, games, movies, and songs that we are eager to download, it becomes hard to keep up with how much disk space is left on the hard drive.
Even if you buy a Mac with a maximum capacity, it can get clogged with rarely used software and unneeded files with time. So it can become beneficial to know a few easy tips on how to free up disk space on macOS.
How to Check Available Space on Mac
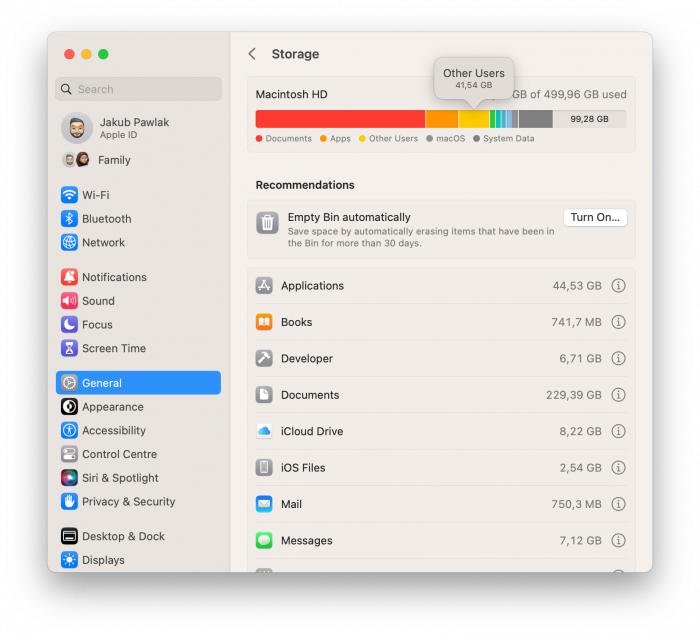
Before we dive deep into freeing up disk space, it is important to check and see how much storage is available and what type of data uses most of it. Maintaining a minimum of 10 percent of free storage at all times is essential to ensure that your Mac operates at an optimal speed. Otherwise, your Mac's performance may suffer and slow down considerably. You may also experience unexpected pop-ups notifying you that your startup disk is almost full.
To check the storage on Mac:
- Click on Apple Menu at the top left of your screen
- Choose About this Mac and open the Storage tab
- Move your mouse over the segments of the bar to see details on each category of data.
Ways to Free up Disk Space on Mac
Once you understand what uses up the storage on the drive, it is time to learn how to clear disk space on Mac and regain those valuable gigabytes. Cleaning a hard drive can be a time-consuming task, and in certain cases, it may also require expertise. So, you can create a backup using Time Machine if you are worried about unintentionally deleting some important data.
1. Improve Storage Usage with Built-in Tools.
In the latest macOS versions, Apple added a Storage Management tool, which gives a few options on how to easily optimize storage in one place. To access this feature:
- Go to Apple Menu → About This Mac → Storage.
- Click on Manage.
- You will be presented with options to move files to iCloud, optimize storage, set up automatic removal of files in Trash, and reduce clutter.
2. Uninstall unused applications.
Applications can take up a lot of disk space, so if there are any apps you rarely or never use, it might be a good idea to uninstall them. You can do so from Launchpad by dragging them to Trash or with the help of third-party software.
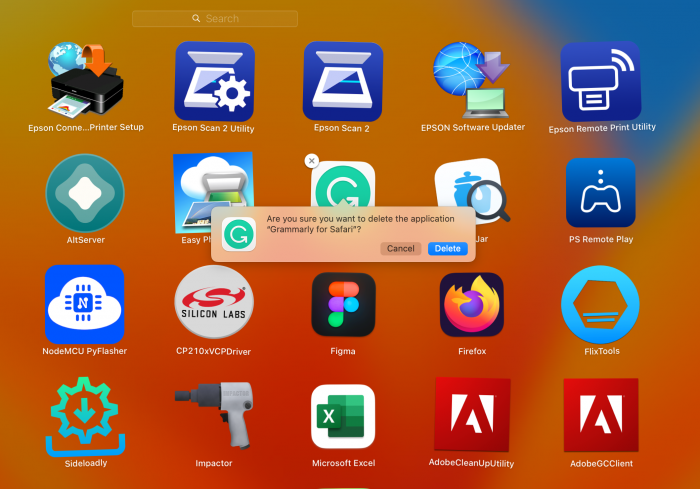
To uninstall apps via Launchpad:
- Open Launchpad (from the icon in the Dock or use the dedicated keyboard button F4).
- Press and hold on the app icon until it starts to shake.
- Click on X near the app.
- Choose Delete in the pop-up window.
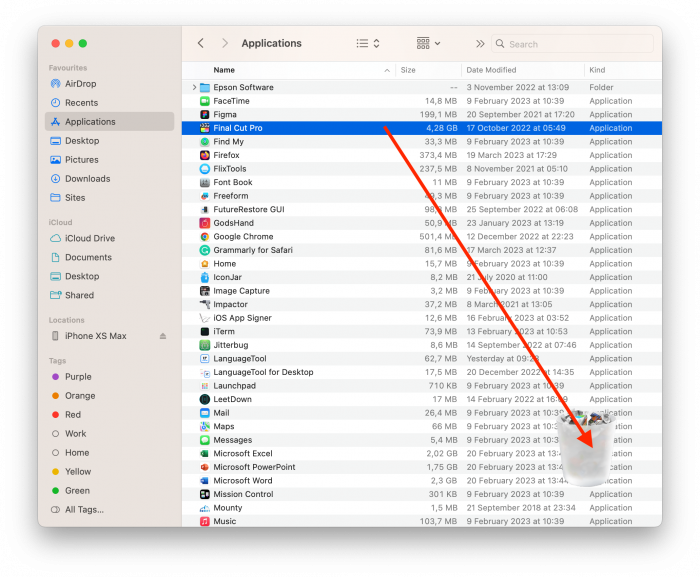
To uninstall apps via the Applications folder:
- Open Finder and go to the Applications folder.
- Grab the app icon and drag it to the Trash icon on the Dock.
- Empty Trash.
3. Clear the Downloads Folder.
All files we download from web browsers are saved in the Downloads folder by default. With time, this folder can become quite large and take up a lot of disk space. So it is a good practice to clear the downloaded files that are no longer needed.
To delete old files in Downloads:
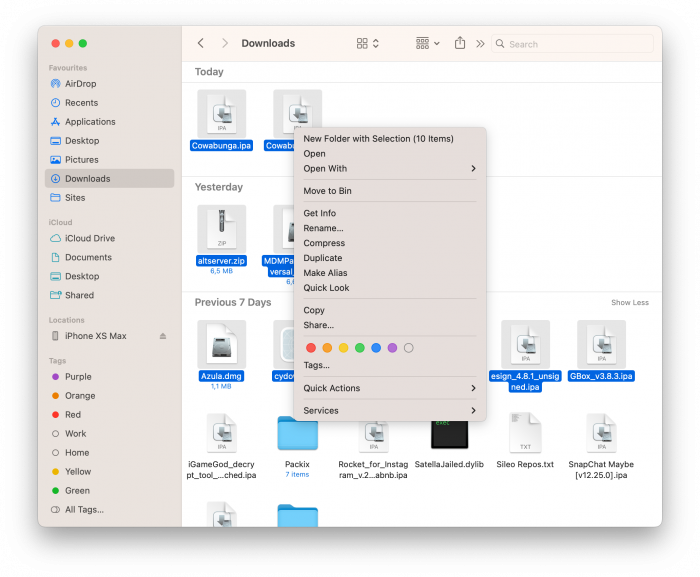
- Open Finder and go to the Downloads folder.
- Click on Date Added to sort files by date range.
- Select the files you want to delete, then right-click and choose Move to Bin.
- Empty Trash.
4. Manage Files on Desktop.
Too many images, screenshots, and other miscellaneous files can pile up on your Desktop. This step won't necessarily free up a few gigabytes, but it is still a great way to reduce clutter and make your Desktop more organized.
To clean up your Desktop folder:
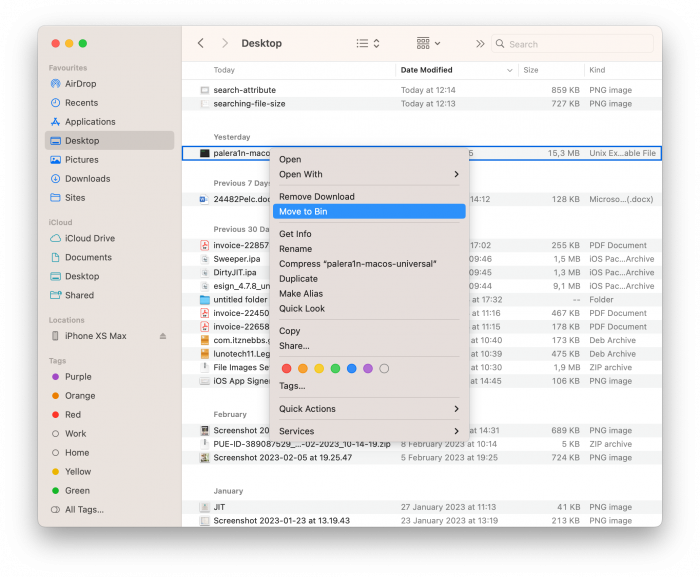
- Open Finder and choose Desktop.
- Click on Size to sort items and detect the largest files.
- Select the files you want to delete, then right-click and choose Move to Bin.
- Empty Trash.
5. Automatically Delete Email Attachments.
Usually, emails don't take up too much disk space, but the attached files like images, documents, and others can significantly reduce the amount of free storage on your Mac. Once such an email is opened, attachments get downloaded on your computer, piling up without your knowledge.
To delete email attachments:
- Open the Mail app from the Applications folder.
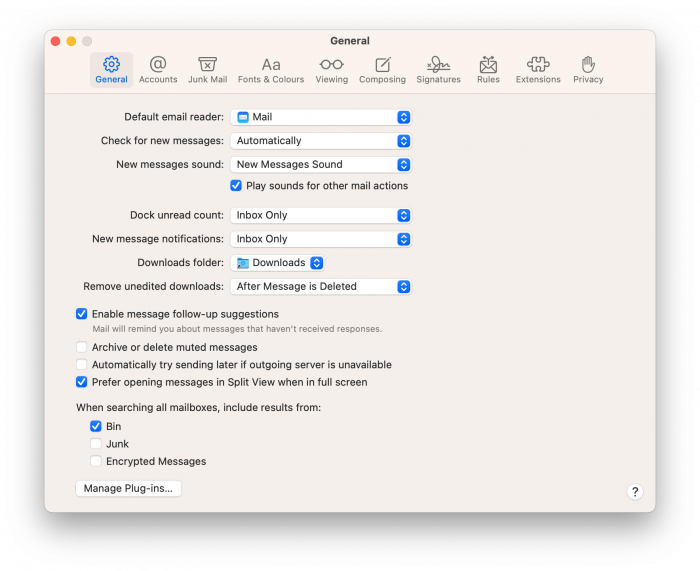
- Go to Mail → Preferences.
- Once in the General tab, look for the Remove unedited downloads option and ensure it is set to After Message is Deleted.
6. Remove Junk Emails.
More than 300 billion spam emails are sent daily, so unfortunately, any email owner has to deal with junk emails from time to time. Although it's advisable not to delete important emails as you may require them in the future, getting rid of spam is perfectly fine. Luckily, with Apple Mail, you can get rid of all those promotional messages automatically.
To delete junk emails:
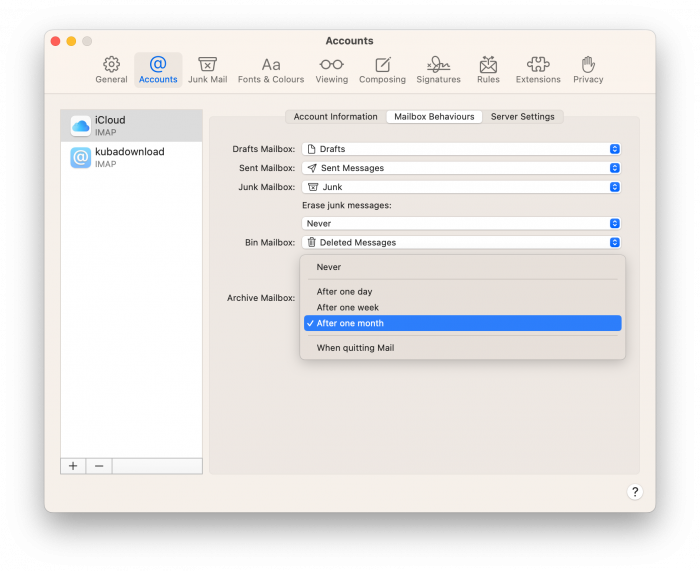
- Open the Mail app and go to Mail → Preferences.
- Select the Account tab → Mailbox Behaviours.
- Look for Erase junk messages and choose the appropriate time range, after which emails will be automatically deleted.
7. Delete Large Files.
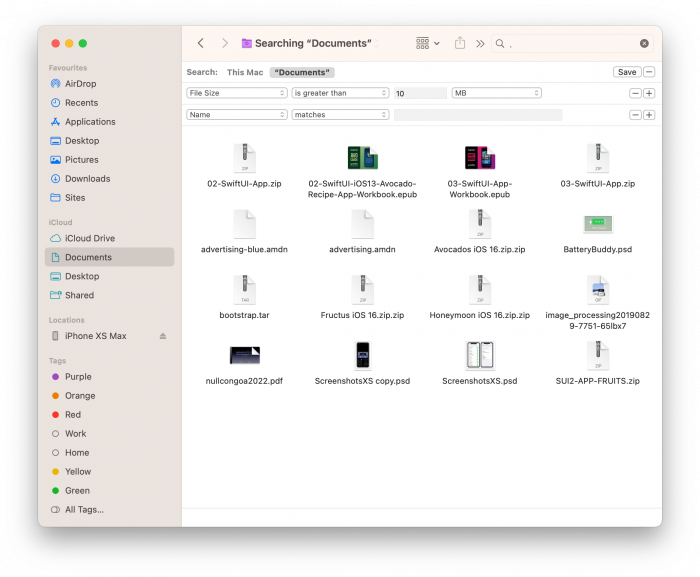
By locating and removing your Mac's largest files, you can reclaim many gigabytes of free storage. You should carefully look through the list and ensure you delete only those you don't need. For example, it is a good idea to remove all DMG files as they are mostly application installers that are useless once the application is installed. The same applies to ZIP archives that duplicate the content you have extracted from those archives.
To find and delete large files:
- Go to Finder → Desktop.
- Press Command + F on your keyboard.
- In Search, choose This Mac.
- Click on Kind and choose Other.
- Select File size in the pop-up menu.
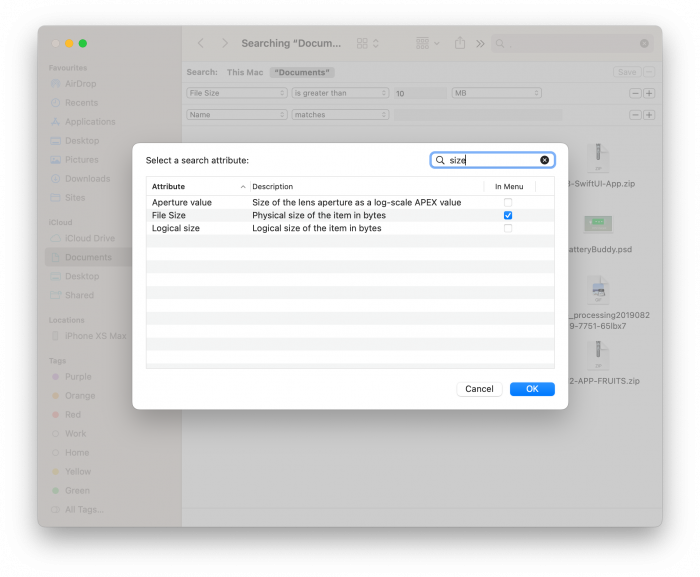
Tip: You can also add other parameters to the search, such as kind, file extension, last opened date, and more.
To Sum Up
Over time every Mac user can end up in a situation with a lack of disk space. Without clutter, email attachments, unused apps, and unneeded large files, you will have more space for essential data and beloved memories. Take control of your hard drive and make freeing up disk space a regular activity to maintain the good performance of your computer.


