Compile futurerestore dev or main branch on macOS

FutureRestore is a hacked version of idevicerestore, offering the capability to manually designate SEP and Baseband for the restoration process. This functionality enables the restoration of unsigned firmware onto devices, contingent upon the availability of a backup of the APTicket (SHSH Blobs). Additionally, it can replicate all the unique conditions of the APTicket, such as ECID, APNonce, and Board ID.
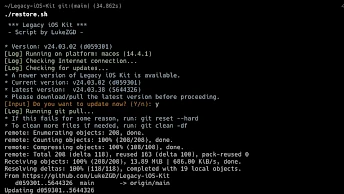
The latest version of futurerestore v194, was released in 2021. Despite this, the software remains under active development, with several branches present in the official GitHub Repository. The most current versions are FutureRestore Dev and FutureRestore main. However, it's worth noting that no compiled versions are available on the release page. Therefore, it is advisable to learn how to compile FutureRestore from its source code.
FutureRestore remains a viable option for downgrading, allowing users to revert, for instance, from iOS 16.7.x to iOS 16.6.1 on checkm8-compatible devices, provided that SHSH blobs have been saved. To execute this process, it's necessary to compile the 'dev' branch of FutureRestore, compile 'gaster', exploit checkm8, and set the nonce accordingly.

When considering downgrading iOS using FutureRestore, relying solely on SHSH2 blobs for your iPhone is insufficient. Equally crucial is the SEP and Baseband Compatibility, as it determines the success of the iOS downgrade process. It's essential to note that not all iOS releases align with the currently running firmware. Consulting the SEP and Baseband Compatibility List for FutureRestore downgrades can significantly enhance your chances of success. Please beware that downgrades from iOS 17 are not possible.
How to compile futurerestore dev on macOS
To compile futurerestore dev or main branch on macOS it's required to install cmake and some other components to make it work. The easiest way to do it is by utilizing Homebrew Package Manager for macOS. If you haven't already, use this command to install Homebrew.
Step 1. Open the terminal app and execute the following command.
/bin/bash -c "$(curl -fsSL https://raw.githubusercontent.com/Homebrew/install/HEAD/install.sh)"Step 2. Install the required components through brew command.
brew install "openssl" "libpng" "libzip" "libimobiledevice" "autoconf" "automake" "autogen" "libtool" "cmake" "coreutils"Step 3. Create a folder and open it in the terminal app.
mkdir ios-downgrade && cd ios-downgradeStep 4. Clone the futurerestore dev or main branch to the new folder.
git clone https://github.com/futurerestore/futurerestore.git --branch dev --recursiveStep 5. Open the futurerestore folder in the terminal app.
cd futurerestoreStep 6. Check your system architecture executing the uname command.
uname -mStep 7. From Cryptic's CDN, click either x86_64 or arm64, based on your architecture, and download the macOS_arm64_Release_Latest.tar.zst file.
curl -C - -0 -o macOS_x86_64_Release_Latest.tar.zst "https://cdn.cryptiiiic.com/deps/static/macOS/x86_64/macOS_x86_64_Release_Latest.tar.zst"Step 8. Extract the macOS_arm64_Release_Latest.tar.zst file.
zstd -d macOS_arm64_Release_Latest.tar.zstStep 9. Open the dep_root folder with the cd command.
cd dep_rootStep 10. Extract the macOS_arm64_Release_Latest.tar archive to the actual folder.
tar -xvf ../macOS_arm64_Release_Latest.tarStep 11. Navigate up in the folder hierarchy to futurerestore.
cd ..Step 12. Compile futurerestore dev or main branch. Modify -DARCH= when required.
./build.sh -DARCH=x86_64 -DNO_PKGCFG=1Step 13. Check that you have a futurerestore binary at cmake-build-release/src.
Available commands
Usage: futurerestore [OPTIONS] iPSW

General options:
  -h, --help				Shows this usage message
  -t, --apticket PATH		Signing tickets used for restoring
  -u, --update				Update instead of erase install (requires appropriate APTicket)
              				DO NOT use this parameter, if you update from jailbroken firmware!
  -w, --wait				Keep rebooting until ApNonce matches APTicket (ApNonce collision, unreliable)
  -d, --debug				Show all code, use to save a log for debug testing
  -e, --exit-recovery		Exit recovery mode and quit
  -z, --no-restore			Do not restore and end right before NOR data is sent
  -c, --custom-latest VERSION		Specify custom latest version to use for SEP, Baseband and other FirmwareUpdater components
  -g, --custom-latest-buildid BUILDID	Specify custom latest buildid to use for SEP, Baseband and other FirmwareUpdater components
  -i, --custom-latest-beta	Get custom url from list of beta firmwares
  -k, --custom-latest-ota	Get custom url from list of ota firmwares
Options for downgrading with Odysseus:
  -3, --use-pwndfu			Restoring devices with Odysseus method. Device needs to be in pwned DFU mode already
  -4, --no-ibss				Restoring devices with Odysseus method. For checkm8/iPwnder32 specifically, bootrom needs to be patched already with unless iPwnder.
  -5, --rdsk PATH			Set custom restore ramdisk for entering restoremode(requires use-pwndfu)
  -6, --rkrn PATH			Set custom restore kernelcache for entering restoremode(requires use-pwndfu)
  -7, --set-nonce			Set custom nonce from your blob then exit recovery(requires use-pwndfu)
  -7, --set-nonce=0xNONCE	Set custom nonce then exit recovery(requires use-pwndfu)
  -8, --serial				Enable serial during boot(requires serial cable and use-pwndfu)
  -9, --boot-args			Set custom restore boot-args(PROCEED WITH CAUTION)(requires use-pwndfu)
  -a, --no-cache			Disable cached patched iBSS/iBEC(requires use-pwndfu)
  -f, --skip-blob			Skip SHSH blob validation(PROCEED WITH CAUTION)(requires use-pwndfu)

Options for SEP:
  -0, --latest-sep			Use latest signed SEP instead of manually specifying one
  -j, --no-rsep				Choose not to send Restore Mode SEP firmware command

Options for baseband:
  -1, --latest-baseband		Use latest signed baseband instead of manually specifying one
  -2, --no-baseband			Skip checks and don't flash baseband
                   			Only use this for device without a baseband (eg. iPod touch or some Wi-Fi only iPads)